In previous posts, we discussed the basics of the html audio element and how to style the audio element with CSS. Now we are going to get into some more advanced things you can do with the <audio> element with JavaScript and some functions that are built into the browser.
The first thing we will do is remove the controls attribute so that instead of
<audio src="path/to/your/audio.mp3" type="audio/mpeg" controls></audio>
we have
<audio src="path/to/your/audio.mp3" type="audio/mpeg"></audio>
But now there’s nothing on the page! Yes, that’s a good thing. It’s still there in the DOM, and we are going to use it to make our own HTML audio player on the page. Let’s add an id attribute so that we can hook into it:
<audio id="my-audio" src="path/to/your/audio.mp3" type="audio/mpeg"></audio>
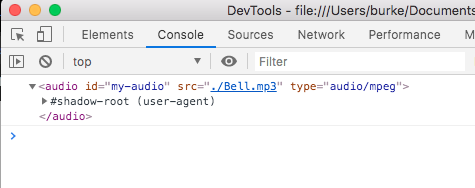
Now let’s add a tiny bit of JavaScript underneath this. All we are going to do here is hook into the audio element so that we can then manipulate it. I’ve added the console.log just so that we can look in the browser console to make sure we have it correctly.
<audio id="my-audio" src="path/to/your/audio.mp3" type="audio/mpeg"></audio>

<script>
var myAudio = document.getElementById('my-audio');
console.log(myAudio);
</script>
(NOTE: In my examples I will have the shadow DOM revealed in my console. If you want to learn how to do this see how to expose the shadow DOM in my previous post.)
Now when you inspect your console you should see something like this:
Adding Control Buttons
So far, so good. We have a handle on the audio element, and now we can start building a play/pause button, volume controls, and other useful UI pieces. Add this code to create a function called playMusic (you can name it whatever you want) that will play the audio found connected to the object myAudio:
<script>
var myAudio = document.getElementById('my-audio');
//console.log(myAudio);

var playMusic = function() {
     myAudio.play()
}
</script>
And in your HTML add a button that calls that function when clicked:
<audio id="my-audio" src="path/to/your/audio.mp3" type="audio/mpeg"></audio>

<button onclick="playMusic()">Play</button>
It should work the way this button does below:
But you don’t have to necessarily attach the click event to a button. You could also have the click event on a div like the one below. Click it to try it out:
…or a hover or a focus, or any other DOM event. Let’s clean up out code at this point. I’m not a big fan of using inline onclick events, so instead we’ll use a click listener on our JS:
<audio id="my-audio" src="path/to/your/audio.mp3" type="audio/mpeg"></audio>

<button id="play-button">Play</button>

<script>
var myAudio = document.getElementById('my-audio');
var playButton = document.getElementById('play-button');

playButton.addEventListener("click", function(){
    myAudio.play();
});
</script>
Those are the very basics of it all, but there are a lot more things attached to myAudio. Here are some methods you can use:
play()
pause()
load()
addTextTrack()
canPlayType()
And there are many properties on the audio object that you can retrieve and also change programmatically:
audioTracks
autoplay
buffered
controller
controls
crossOrigin
currentSrc
currentTime
defaultMuted
defaultPlaybackRate
duration
ended
error
loop
mediaGroup
muted
networkState
paused
playbackRate
played
preload
readyState
seekable
seeking
src
startDate
textTracks
videoTracks
volume
Many of these have Boolean values, and others are numeric or strings. There is a good explanation of all of these at: https://www.w3schools.com/tags/ref_av_dom.asp
If we wanted to add a pause button and some volume up/down buttons it could be as simple as
<audio id="my-audio" src="path/to/your/audio.mp3" type="audio/mpeg"></audio>

<button id="play-button">Play</button>
<button id="pause-button">Pause</button>
<button id="vol-up-btn">Volume Up</button>
<button id="vol-down-btn">Volume Down</button>

<script>
var myAudio = document.getElementById('my-audio');
var playButton = document.getElementById('play-button');
var pauseButton = document.getElementById('pause-button');
var volUpButton = document.getElementById('vol-up-btn');
var volDownButton = document.getElementById('vol-down-btn');

playButton.addEventListener("click", function(){
    myAudio.play();
});
pauseButton.addEventListener("click", function(){
    myAudio.pause();
});
volUpButton.addEventListener("click", function(){
    myAudio.volume+=0.1;
});
volDownButton.addEventListener("click", function(){
    myAudio.volume-=0.1;
});
</script>
This is probably a good place to stop for now. There is enough here to get you started and to get you thinking about what features you want your player to have and what information you want to add to the UI.
In the next article we will take these concepts and build an HTML audio player with a volume slider, and playtime clock.
I can’t find the next article for the volume slider and playtime clock 🙁 is it not out yet?
Try here: https://pointclearmedia.com/2020/09/10/how-to-build-a-html-audio-player-with-vanilla-js-part-2/